How to read this guide
Do A first pass once. After that, use the headings. Shortcuts follow the keyboard layout you choose, so the live list is always Help → Keyboard Shortcuts.
People also ask
What is Ambitura?
Desktop software that spots a picture: scene changes, location labels, room tone from your own library, and FX and Foley guide clips, then a handoff to Pro Tools or another workstation.
Is Ambitura a plugin?
No. It is a standalone app for Windows and macOS. It pushes into Pro Tools, Resolve Studio, and Premiere, or writes AAF, EDL, XML, and CSV.
Does Ambitura upload my video?
Not for a local pass. Local analysis is unlimited and stays on your machine. A cloud pass is optional, shows the credit cost first, and sends only what that pass needs.
How do I get ambiance into Pro Tools?
Open Pro Tools 2022.12 or newer with live integration on, then push from Ambitura. It builds two alternating stereo tracks, AMB-A and AMB-B, with crossfades.
What is the difference between local analysis and Cloud AI?
Local analysis does not spend credits. Cloud passes — Classify, Classify + Locate, and Full Ambiance Design — do, and only when you confirm them.
What Ambitura is for
Use it when a picture needs a scene list and a bed of room tone before you start cutting effects.
- Scene cuts. It watches the picture and listens to the audio, and it sets how aggressive the cuts are from the material itself.
- Labels. Interior or exterior, time of day, location, and shot type, each with a score in the grid.
- Noise it tries to ignore. Shot-reverse-shot, fades, titles, and credits, so a camera angle is not a new room.
- Room tone. It matches a file from the folders you point it at, and you can lock a different one.
- A handoff. Live push into an open session, or a file export.
- Local learning. Corrections you make in this session teach the next similar one. That learning stays on this computer.
Local analysis does not spend credits. Cloud passes do, and only when you choose one.
What you need
| Windows | macOS | |
|---|---|---|
| System | Windows 10 or 11, 64-bit | macOS 12.6 or later, Intel or Apple silicon |
| Memory | 8 GB minimum, 16 GB comfortable | 8 GB minimum, 16 GB comfortable |
| Picture | A dedicated graphics card is comfortable. Integrated graphics and the processor still run the job | Built-in acceleration where the machine has it |
| Disk | About 3 GB for the installer, about 9–10 GB after the first launch finishes the local models | The same |
Stay online for that first launch. The installer is the start. The app then downloads the models it uses on the machine, and the status shows that progress.
For the handoff
These are optional. Spotting and the marker grid work without them.
- Pro Tools 2022.12 or newer for a live push that builds tracks and places clips.
- DaVinci Resolve Studio for a live push. The free edition takes an EDL.
- Premiere Pro 2025 or newer, with the Ambitura Link plugin installed from the app.
- Anything else the export needs is set up the first time you use that target.
Ambitura picks a quality mode from the machine: finer on a strong computer, faster on a laptop. Change it any time under Preferences → Performance.
Install and sign in
This is the desktop app. Plugin installers are a different download.
Windows
- Download the archive from your account or the product page, extract it, and run the installer inside.
- The installer is about 3 GB. The first launch downloads the local models and brings the install to about 9–10 GB. Leave it online until that step finishes.
- Sign in with the same email and password as your Paraflex account. That ties this computer to the subscription.
macOS
- Download the package and run it. It installs into Applications.
- If the system blocks the first open, right-click Ambitura and choose Open.
- Sign in with the same account as the website.
How many computers
| Plan | Machines signed in at once |
|---|---|
| Solo | 1 |
| Studio | 3 |
| Enterprise | 5, with extra seats available |
Retire a machine from your account before you move the seat. After you have signed in, you can work away from the internet for a grace period. Reconnect before that period ends so the session stays valid.
First launch
The first open walks through setup, in this order.
- Local models. The app downloads what it needs to analyse on this computer. Stay online until the progress finishes.
- Hardware check. A short status for the graphics path and the processor. A warning here is information. The job can still run.
- Ambiance library. Add the folders that hold your room-tone files, or skip and add them later under Library → Manage Libraries.
The window
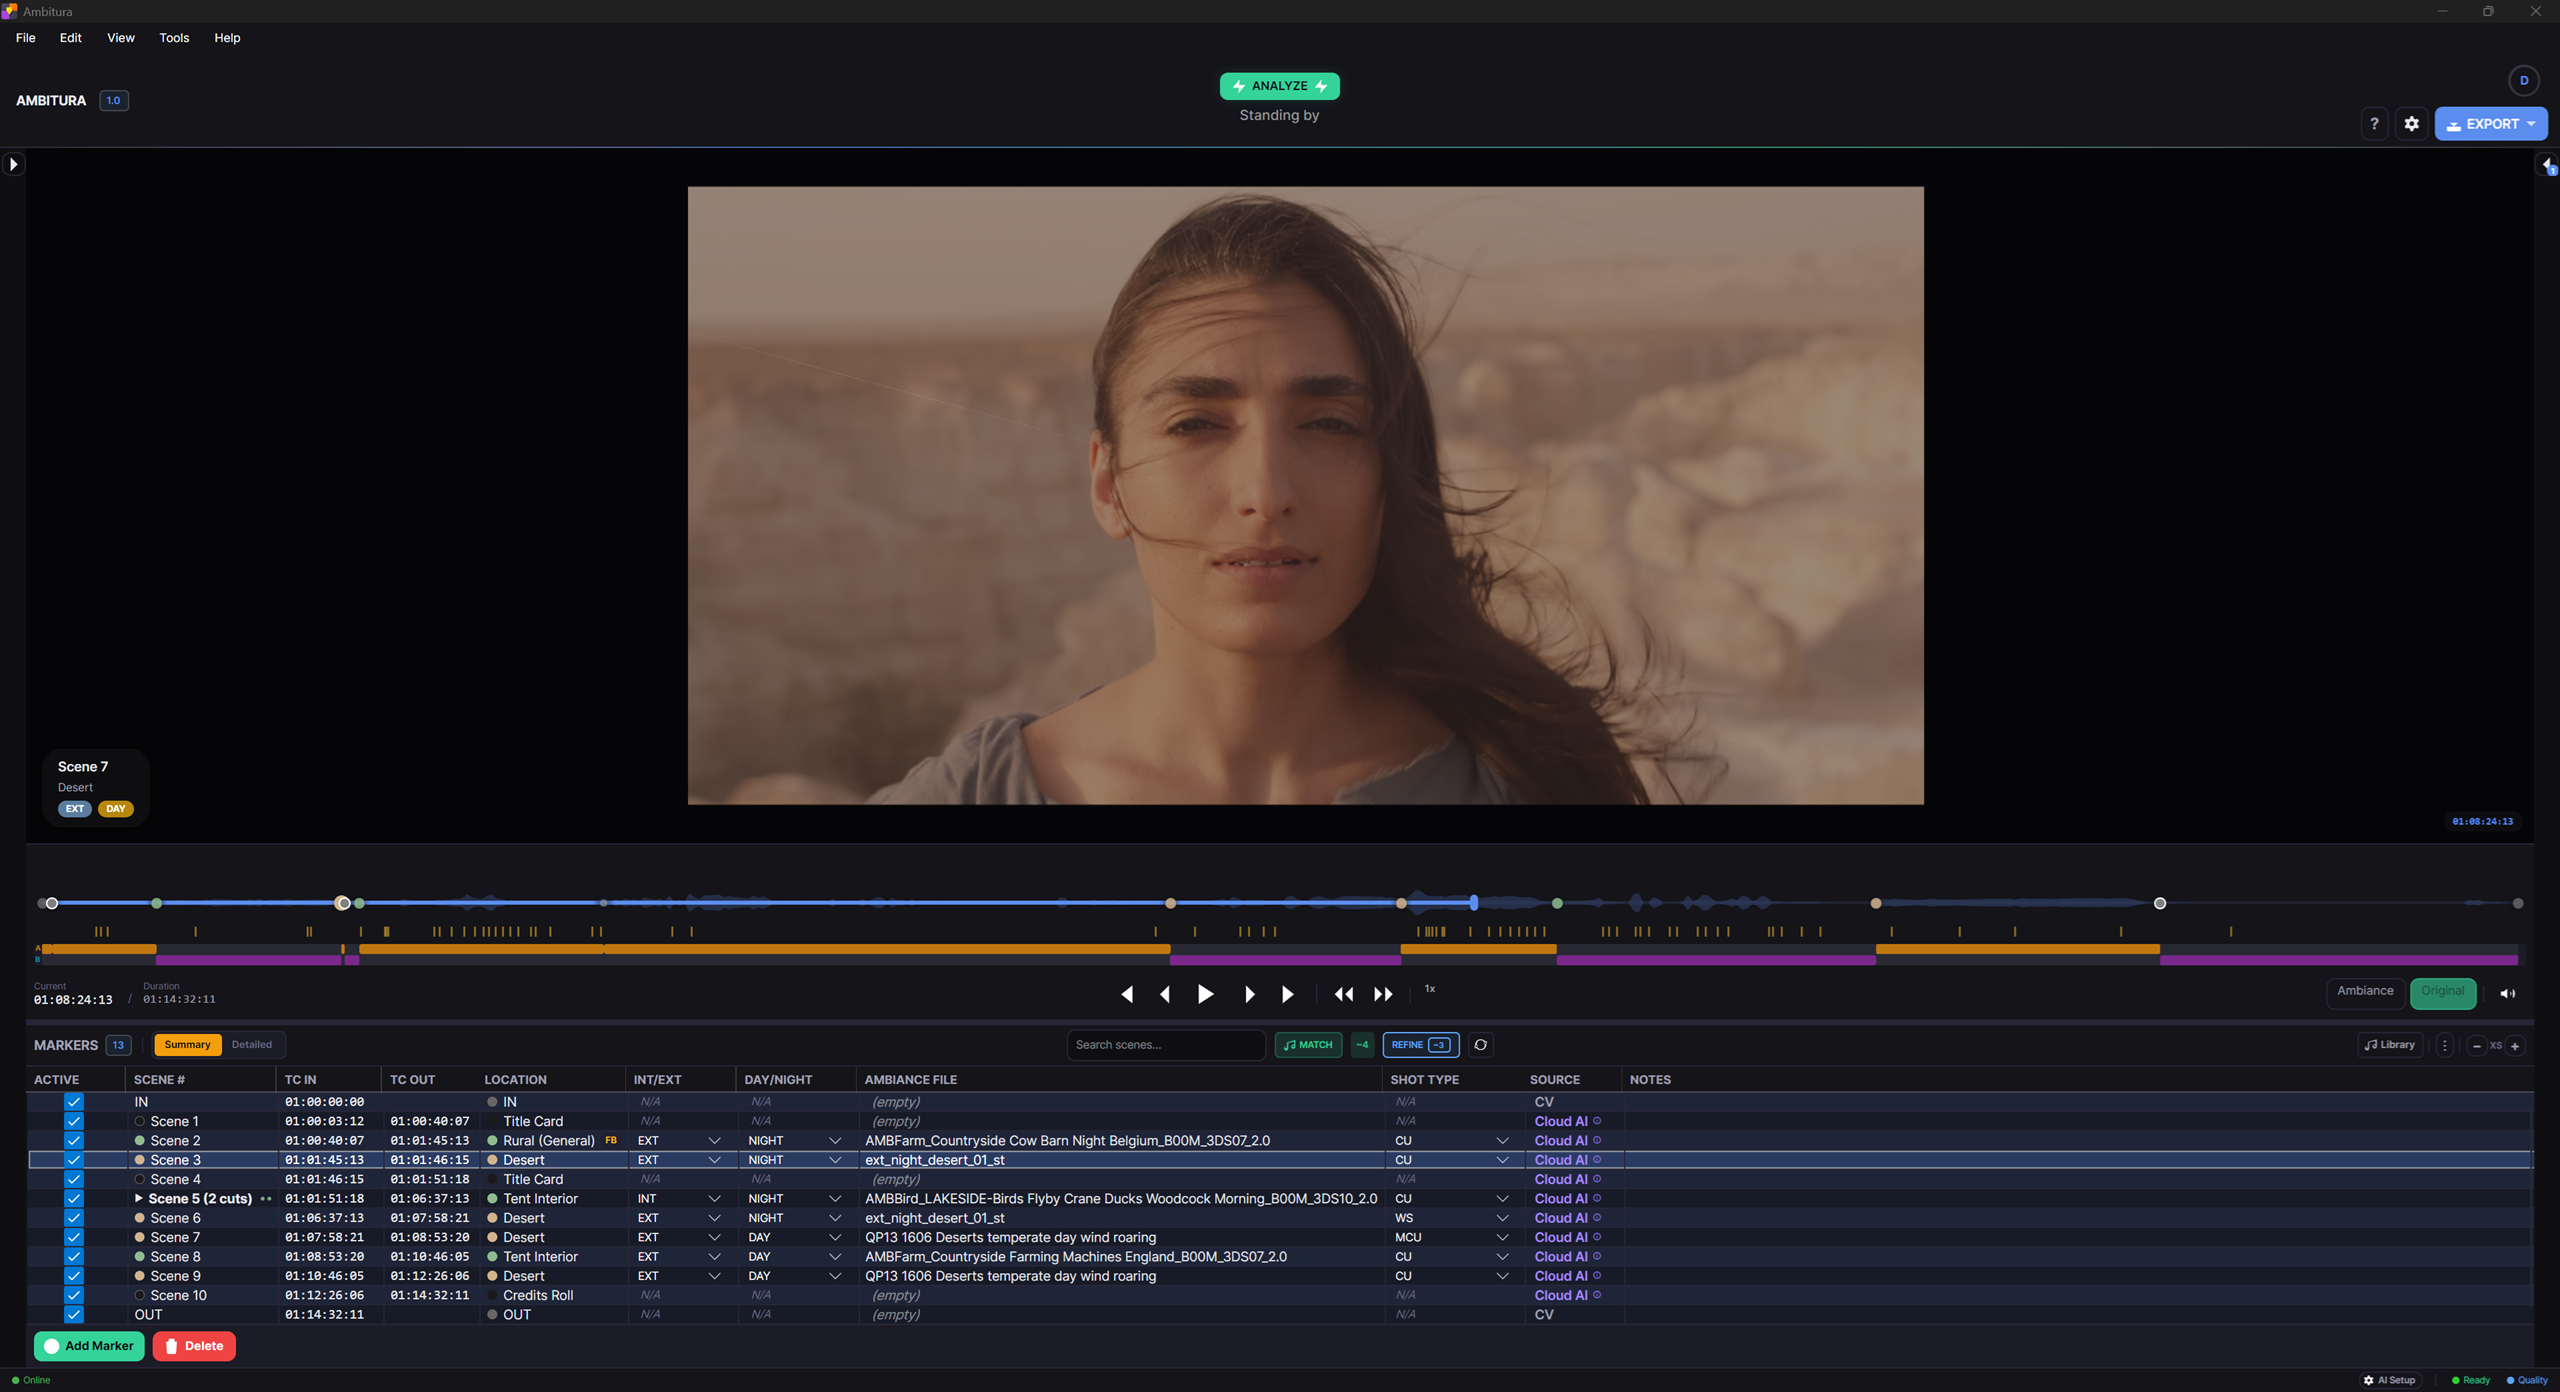
The menus are File, Edit, View, Tools, and Help. Analyze sits in the centre of the top bar. Export sits at the right, with account and readiness beside it.

| Region | What it is for |
|---|---|
| Picture | Frame-accurate playback. Drop a file here or use File → Open |
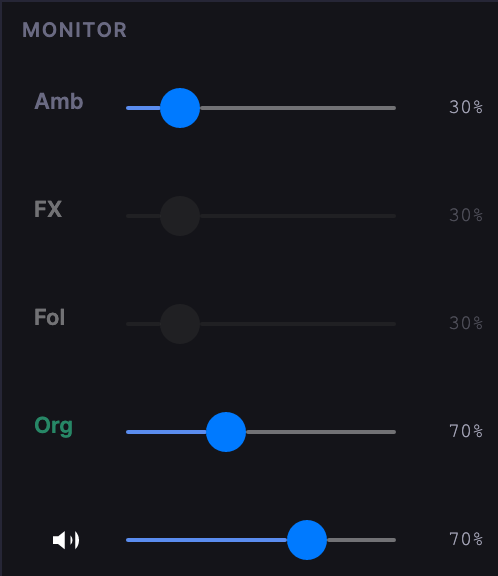
| Transport | Timecode, play, step, volume, and the scrubber under the picture |
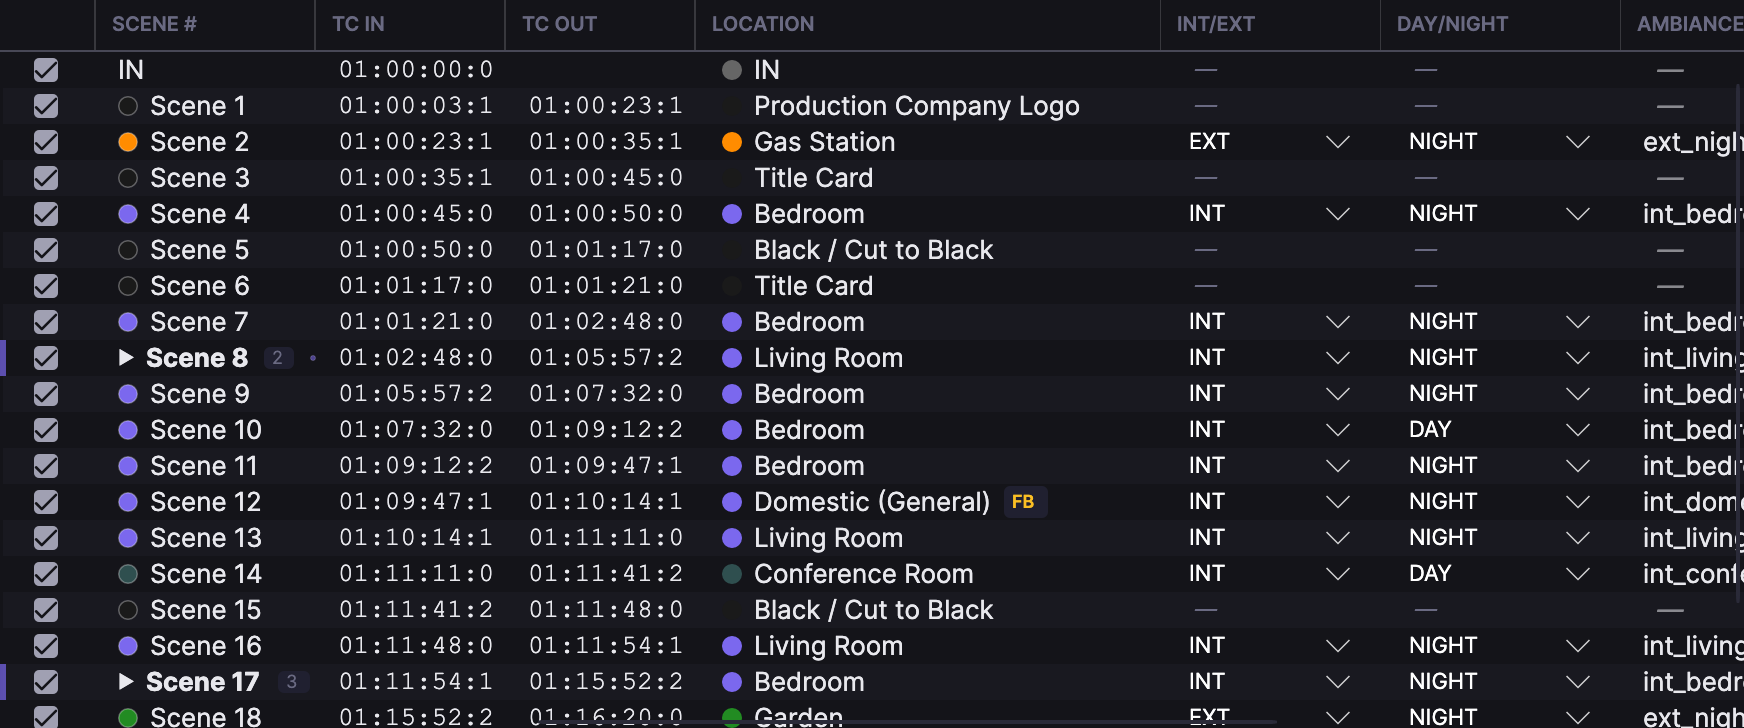
| Marker grid | One row per scene: number, in and out, location, interior or exterior, day or night, the matched file, shot type, where the label came from, and notes |
| Status | Progress, how many scenes, how much of the picture has a matched tone |
Detailed shows every marker as its own row. Summary groups them. Search sits on the grid. View → Theme switches dark and light. Fullscreen for the picture is in the View menu, and the shortcut follows your keyboard layout.
Row colour is not a confidence legend. Read the scores in the grid.
A first pass
- Drop a video on the window, or use File → Open.
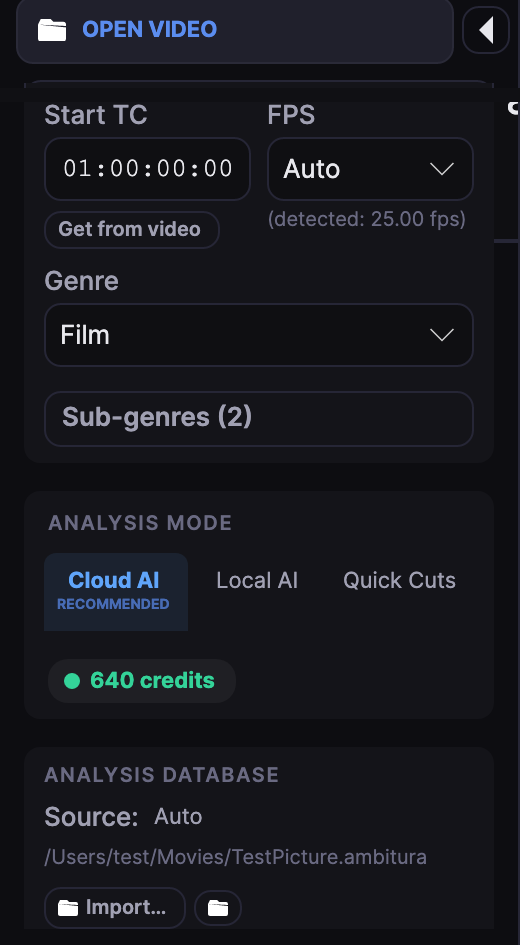
- Click the timecode above the picture if the session does not start at
01:00:00:00. - Set the frame rate if the detected rate does not match the session. Set a profile and a genre if you want the labels tuned: Narrative, Documentary, Commercial, Music Video, or the closest genre you have.
- Optional: a short concept line, such as “suburban home, hospital, small-town streets”. Labels lean toward what you name and away from what you leave out.
- Press Analyze.
- Read the grid. Fix a wrong location. Lock a room-tone file if the match is wrong.
- Export into the open session, or write a file.
File → Batch Analyze queues several files with the same settings and writes a separate session for each when it finishes.
What you can open
Common pictures: MP4, MOV, MKV, AVI, M4V, WEBM, MXF, including the usual camera and finishing codecs. The frame rate is detected. Override it from the rate control above the grid when the session uses a different rate, so the timecode matches.
A bad frame should not stop the job. The decode keeps going.
Analyse
Analyze is the toolbar button and a menu command. The shortcut depends on the keyboard layout.
While it runs it:
- Finds scene cuts and filters camera angles, fades, titles, and credits.
- Labels interior or exterior, time of day, location, and shot type.
- Smooths neighbouring scenes so a location does not flicker.
- Writes a score on each marker. If Review Mode is on, an uncertain boundary can stop for you.
- Eases off when it notices a workstation is open, so the session stays usable.
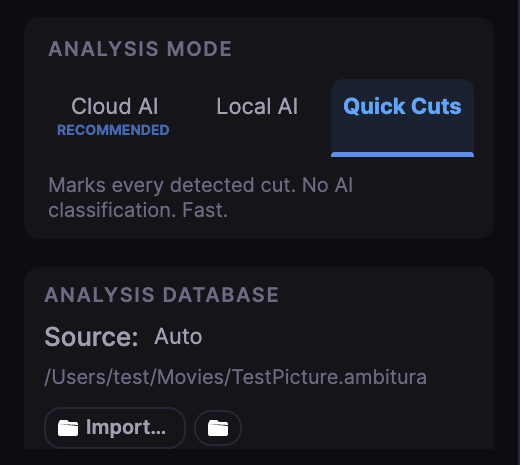
- Keeps a result beside the file. Opening the same picture again can skip the work.
- Can notify you when it finishes, if you turned notifications on.
Cancel is on the progress. Sensitivity is not a knob. The app sets how aggressive the cuts are from the picture and the context.
| Setting | What you choose |
|---|---|
| Profile | Narrative, Documentary, Commercial, Music Video, or one you saved under Preferences → Detection |
| Genre | Film, TV, Documentary, Music Video, Animation, or Commercial. Pick the closest |
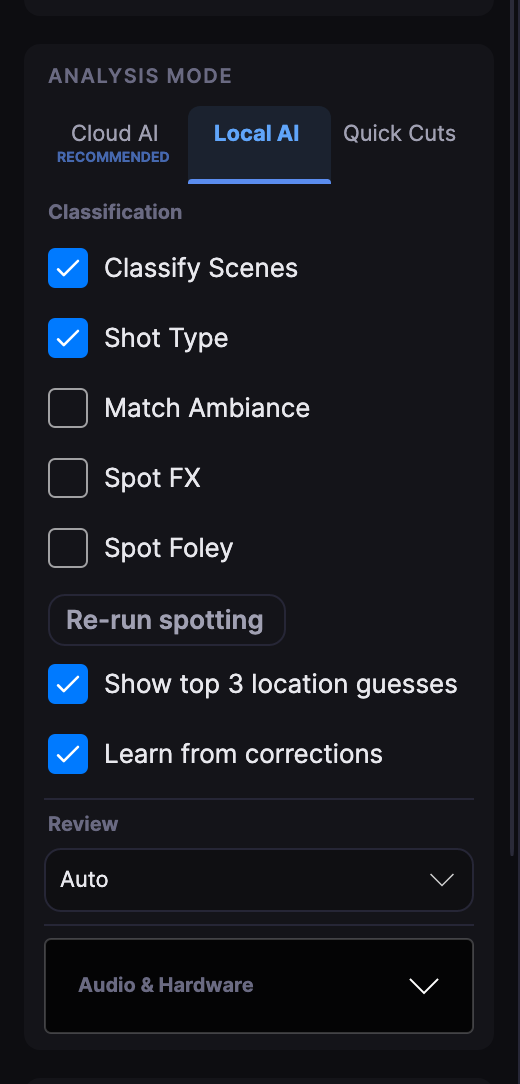
| Review Mode | On: uncertain cuts can open a frame comparison. Off: the pass runs through |
Review the markers
Every scene is a row. Click a cell to change it.
- Double-click a row, or confirm the selection, to seek. The exact key is in Help → Keyboard Shortcuts.
- Move a marker to the playhead, add one, or rename it from the menu or the shortcut for your layout. A marker you add teaches the local learning.
- Copy a timecode from the shortcut list.
- Delete the selection with Delete or Backspace.
- Undo and redo use the usual edit keys.

Frame comparison
With Review Mode on, an uncertain boundary can show the last frame before the cut and the first frame after.
| Choice | Meaning |
|---|---|
| Same scene | There is no real change of space. Treat them as one |
| Different scene | Keep the boundary |
| Skip | Decide later. This choice does not teach anything |
Locations
| Field | Values |
|---|---|
| Interior / exterior | Interior, exterior |
| Time of day | Day, night, dawn, dusk |
| Location | A wide list: street, living room, forest, hospital, office, and many more. You can type your own |
| Shot type | Close-up, medium, wide, establishing, two-shot, over-the-shoulder, point of view, aerial |
| Special | Logos, titles, and end credits are tagged on their own so they do not receive room tone |
Edit the location cell and suggestions appear as you type, with scores. Picking one is faster than typing, and it updates what the app will prefer next time. A custom name is remembered on this computer.
The quick tags apply to the rows you have selected: interior, exterior, day, night, and location presets you use often. Add presets under Preferences → Presets.
FX and Foley
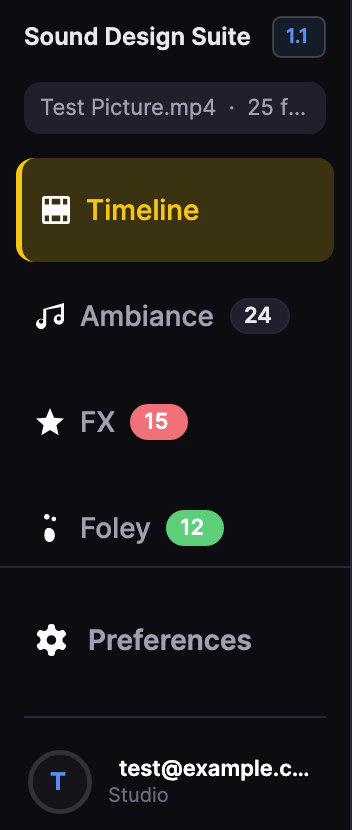
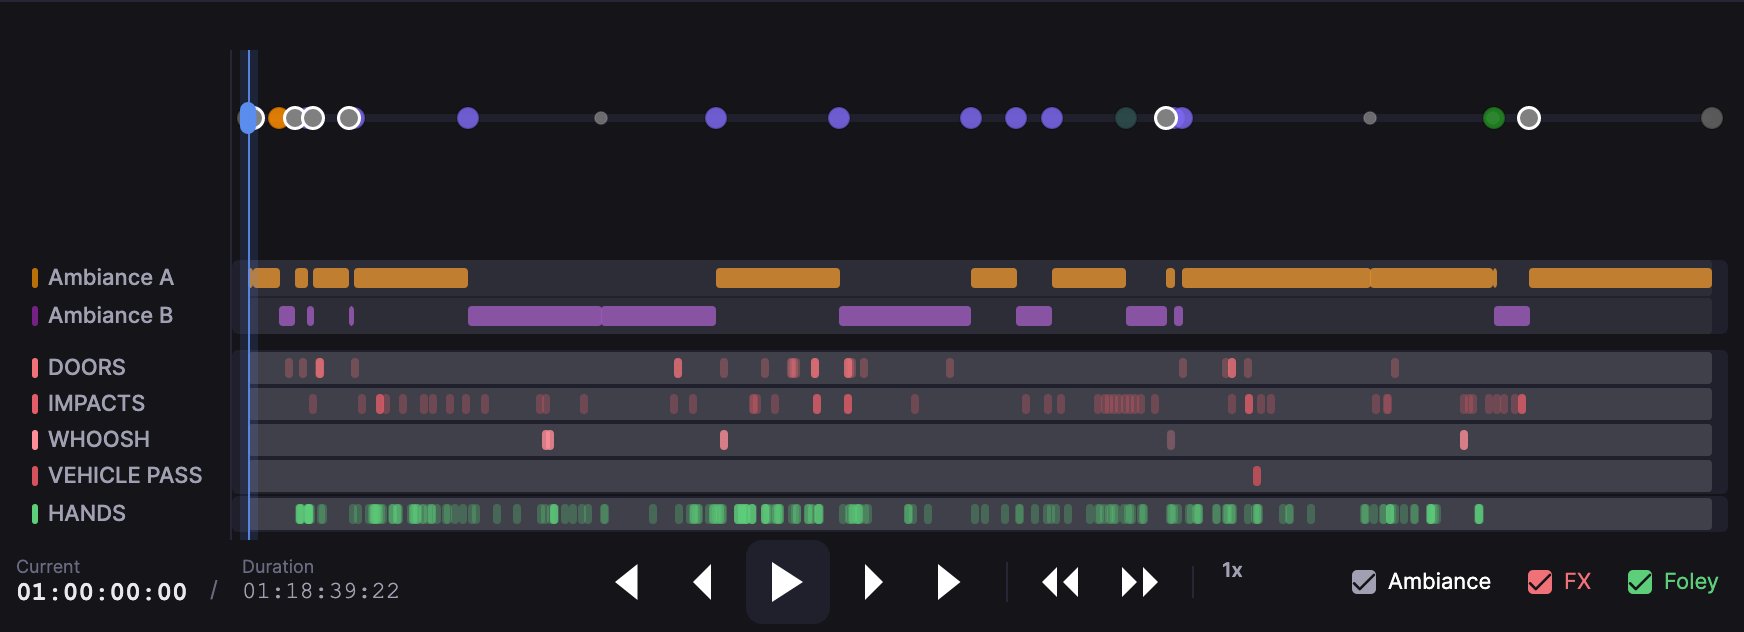
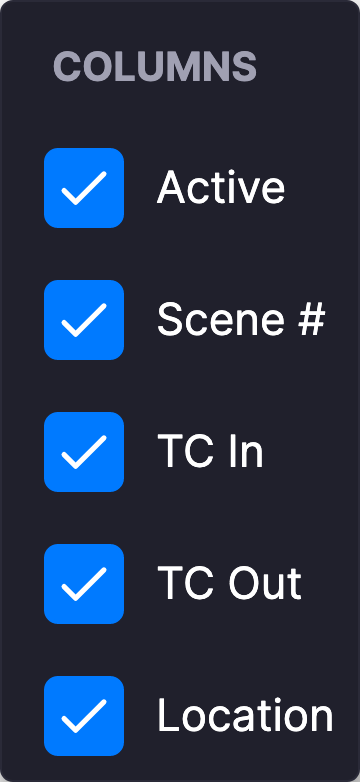
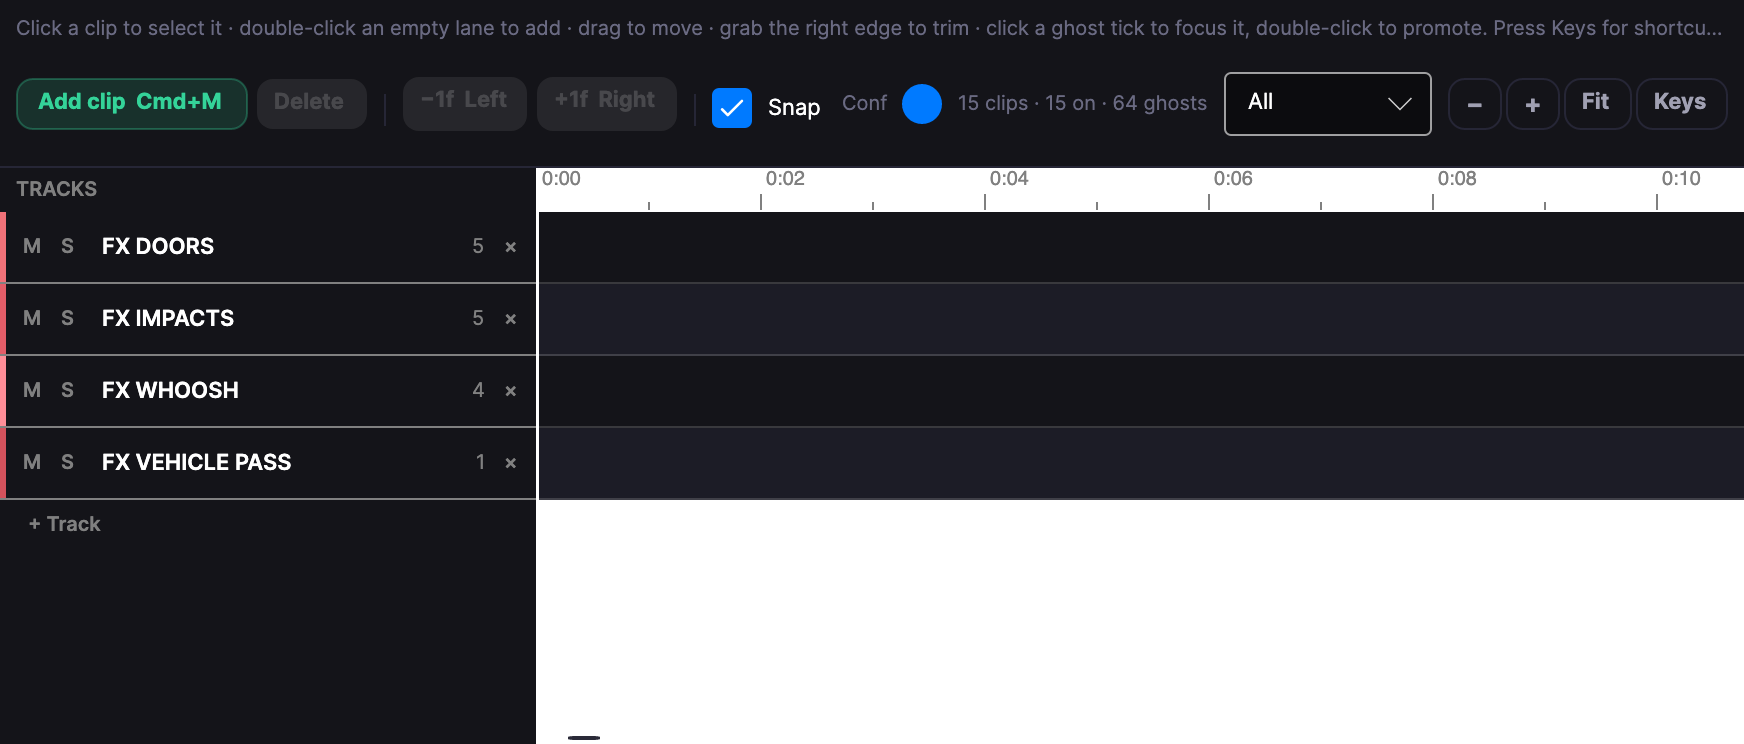
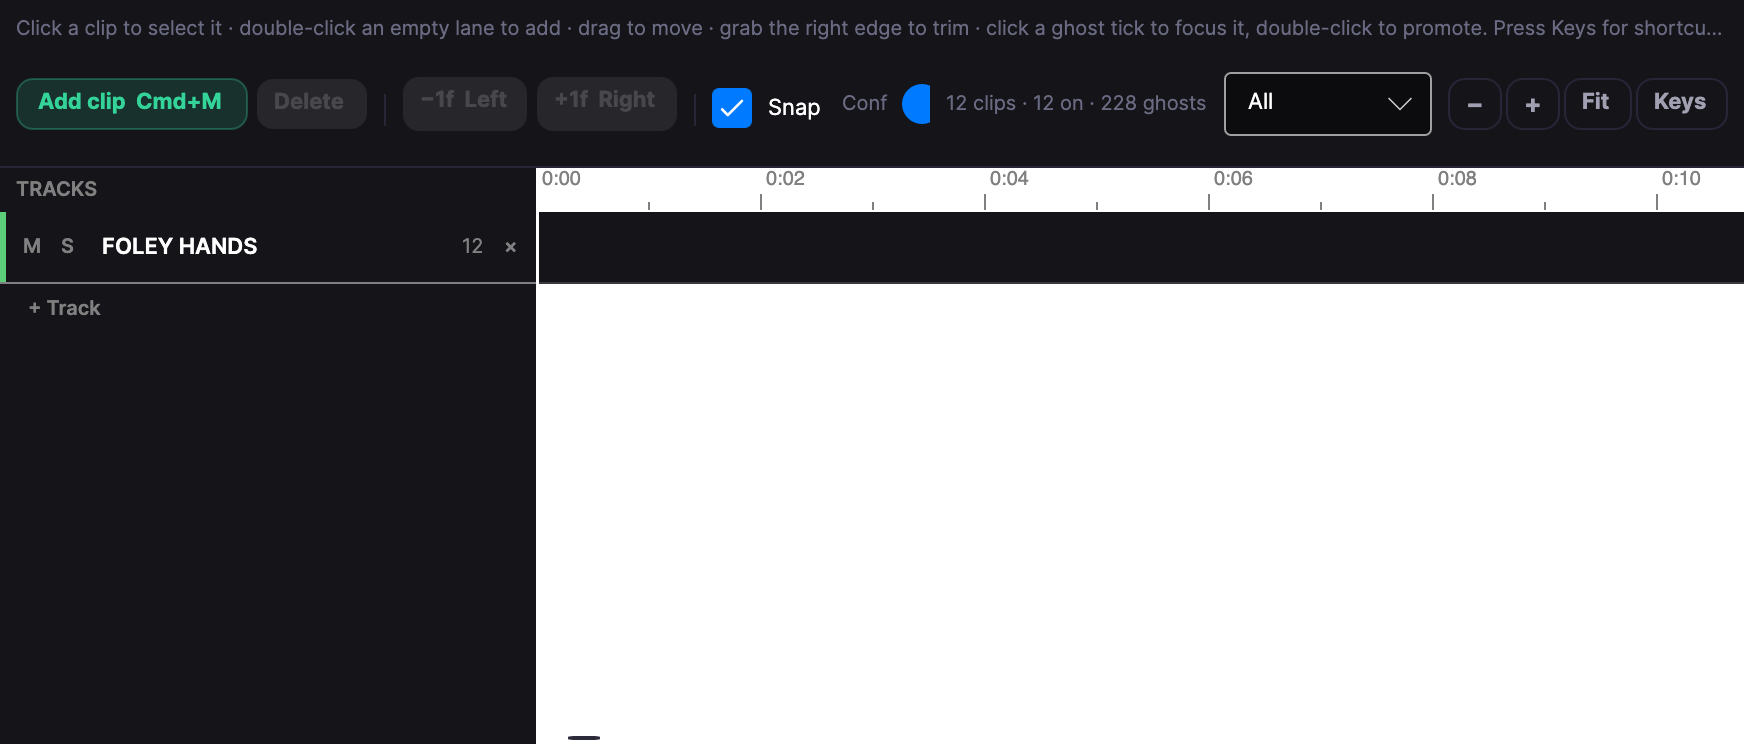
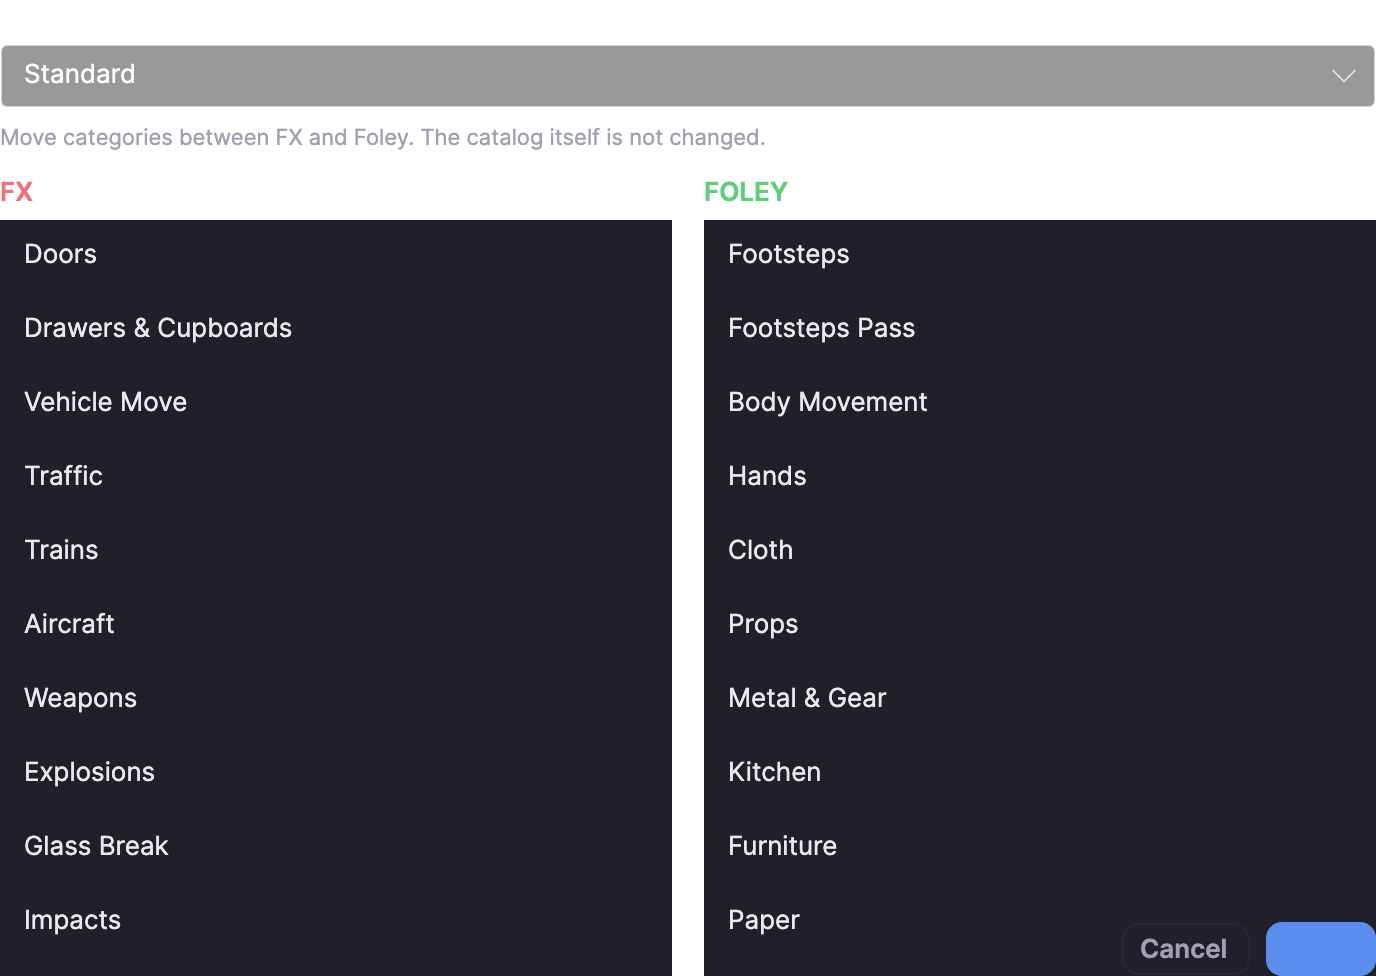
FX and Foley are their own pages on the rail. They stay empty until a spotting pass has run. Spotting is optional. It does not start just because you analysed the picture.
Cloud passes
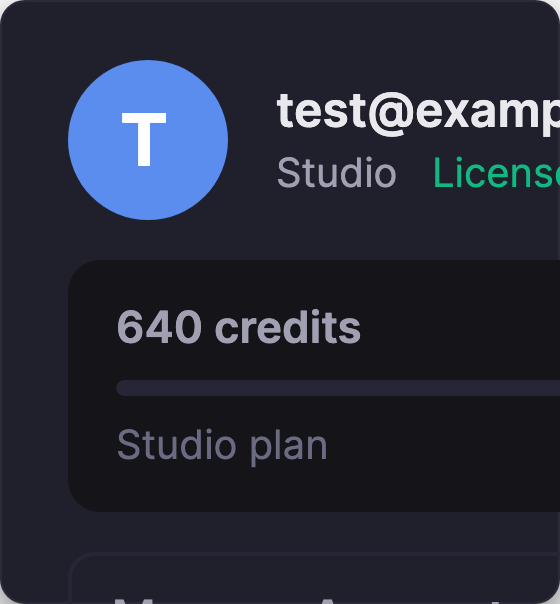
Local analysis does not use credits. A cloud pass is optional, and the app shows the credit cost before you confirm it.
| Pass | What you get |
|---|---|
| Classify | Interior or exterior, time of day, shot type, scene boundaries |
| Classify + Locate | Classify, plus a location category and a location name |
| Full Ambiance Design | Classify + Locate, plus a match from your library |
A failed or unusable scene is credited back when the adjustment is applied. Subscription credits reset each billing cycle. Top-up credits sit on top of the plan and expire three months after you buy them.
| Plan | Cloud credits each month |
|---|---|
| Solo | 100 |
| Studio | 750 |
| Enterprise | 1500 |
Plans, top-ups, and extra seats are on the Ambitura product page.
Local work never uploads the picture. A cloud pass sends only what that pass needs, and the confirmation step says what that is.
Your room-tone library
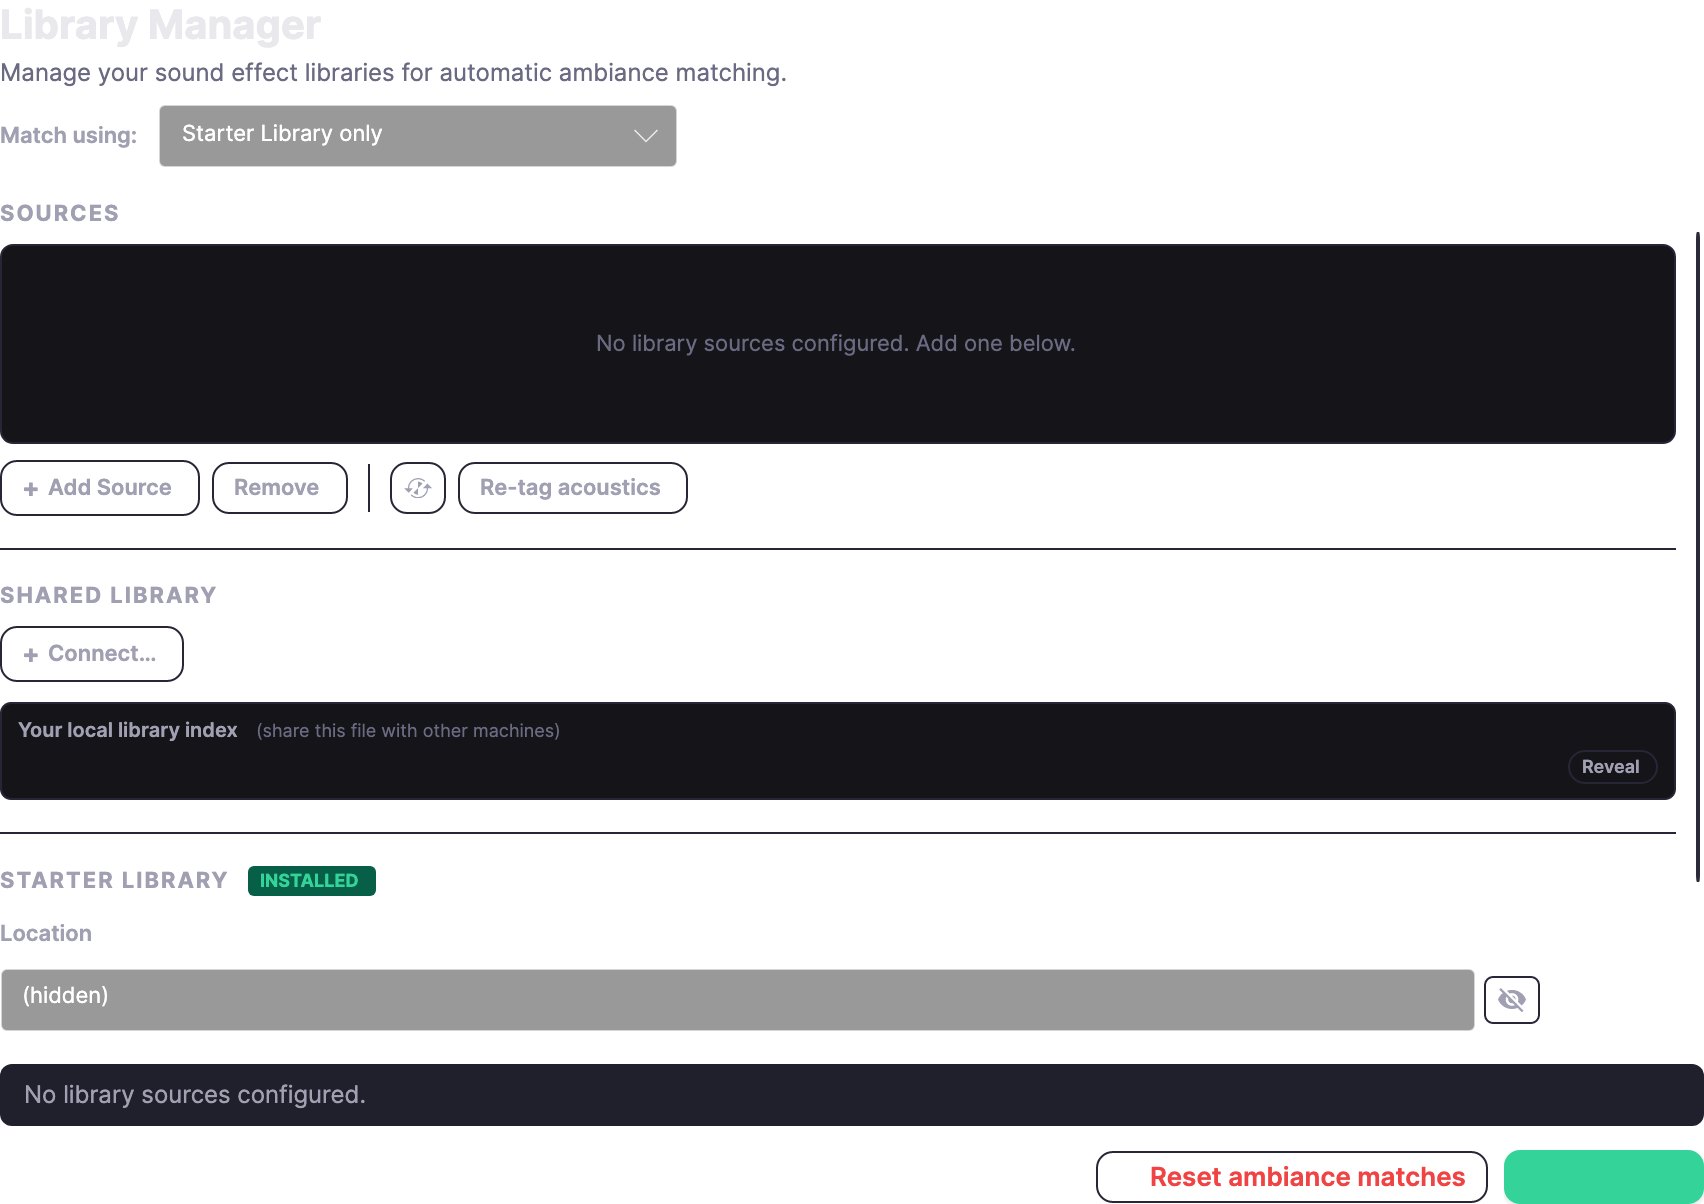
Library → Manage Libraries adds one or more folders of room-tone files. You do not have to rebuild your folders. Flat, by genre, or by location all work.
- The first scan indexes names, folder hints, duration, and stereo or mono. Later scans only pick up changes.
- The files stay on this computer.
- Re-scan after you add files.
Matching prefers the closest folder for interior or exterior, time of day, and location, then a broader file in the same library if it has to. On a scene you can still preview alternatives and lock the file you want. The grid shows the matched name, and the source column shows whether it came from the local pass or a cloud pass.
The manager also shows coverage: which kinds of scene have a file and which do not.
Export
Export is the menu at the top right. File → Export is the same list. The shortcut follows your layout; the default is Ctrl+E on Windows and Command+E on macOS. Quick Export repeats the last target with markers only.
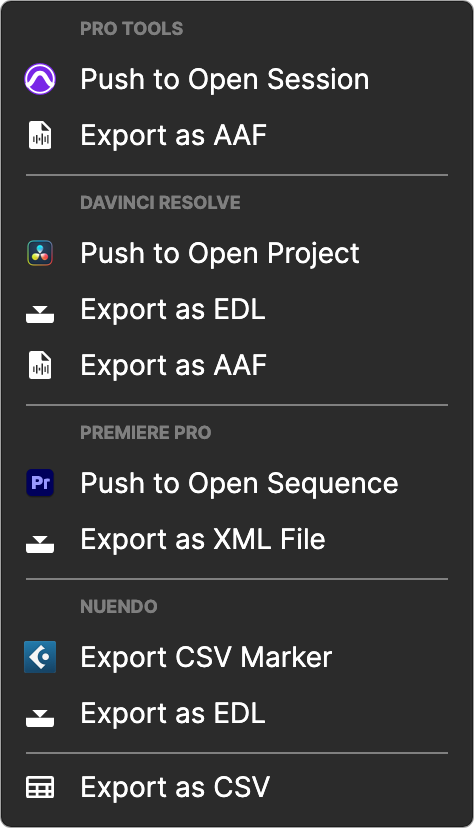
| Where | What to choose | What you get |
|---|---|---|
| Pro Tools | Push to the open session | Tracks, clips at timecode, and crossfades |
| Pro Tools | Export as AAF | A file for File → Import → Session Data |
| Resolve Studio | Push to the open project | Markers and clips into the running project |
| Resolve, including the free edition | Export as EDL | Timeline → Import → EDL |
| Resolve | Export as AAF | File → Import → Timeline |
| Premiere Pro | Push to the open sequence | Markers on the active sequence, after Ambitura Link is installed |
| Premiere Pro | Export as XML | A file for File → Import |
| Nuendo | Export CSV markers | A marker file Nuendo can import |
| Nuendo | Export as EDL | Coloured cycle markers for Fill Loop |
| Any workstation or a spreadsheet | Export as CSV | Timecode and labels |
Pro Tools
- Open Pro Tools 2022.12 or newer and turn on live integration in its setup.
- Open or create a session at the same frame rate and start timecode.
- In Ambitura, choose the Pro Tools push.
- Ambitura creates two stereo tracks, AMB-A and AMB-B, and alternates scenes between them so neighbours never share a track.
- Crossfades land on the boundaries. A scene longer than its file also gets a loop crossfade.
- Each clip keeps a handle before the source in-point, so you can pull the tone earlier without importing again.
Two tracks are there so you can slip one scene without dragging the next one, and the crossfades stay intact.
Premiere Pro
- Help → Install Premiere Plugin, and follow the setup. The first time takes a few minutes because Premiere’s plugin system needs a step outside Premiere.
- Open Premiere with the sequence active. The plugin talks to Ambitura on the same computer.
- Push to the open sequence, or export an XML and import that.
If the live push fails
Open the workstation with a session or sequence already up, confirm the live-integration or plugin step, and push again. Scene detection itself does not need the workstation.
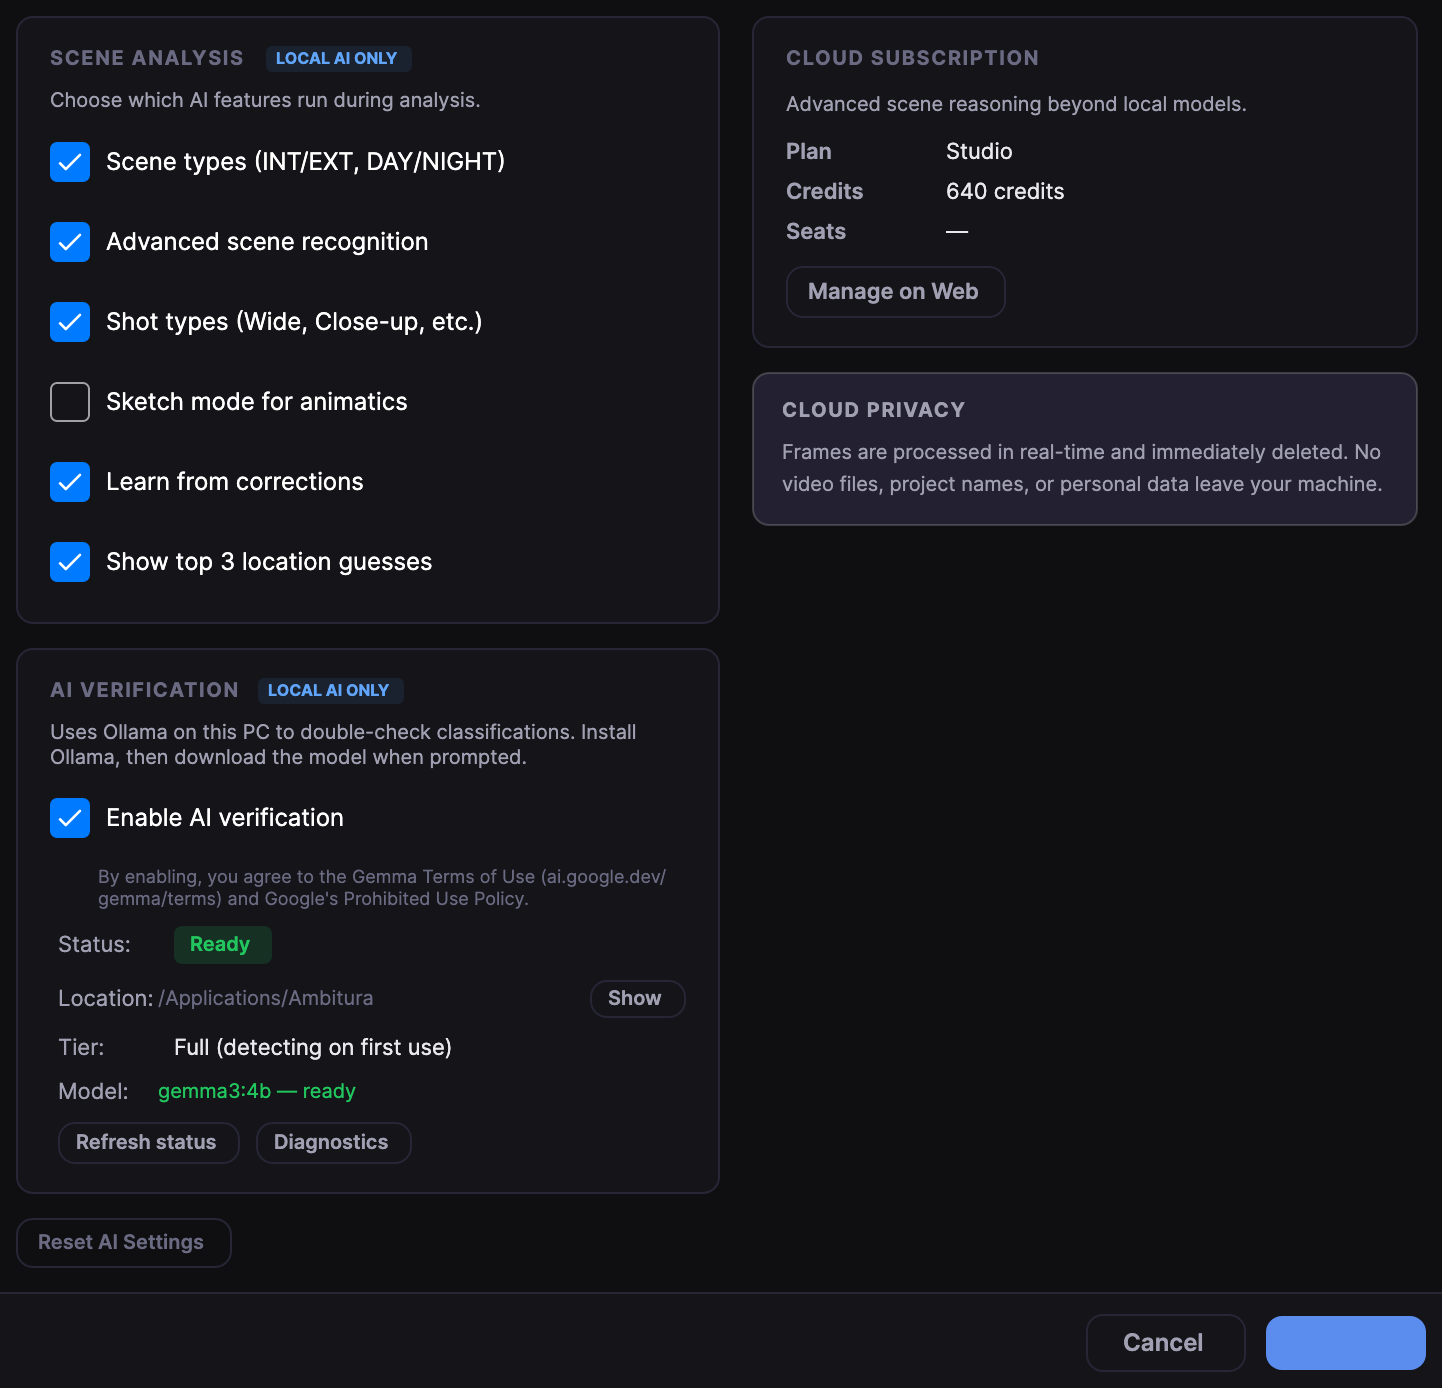
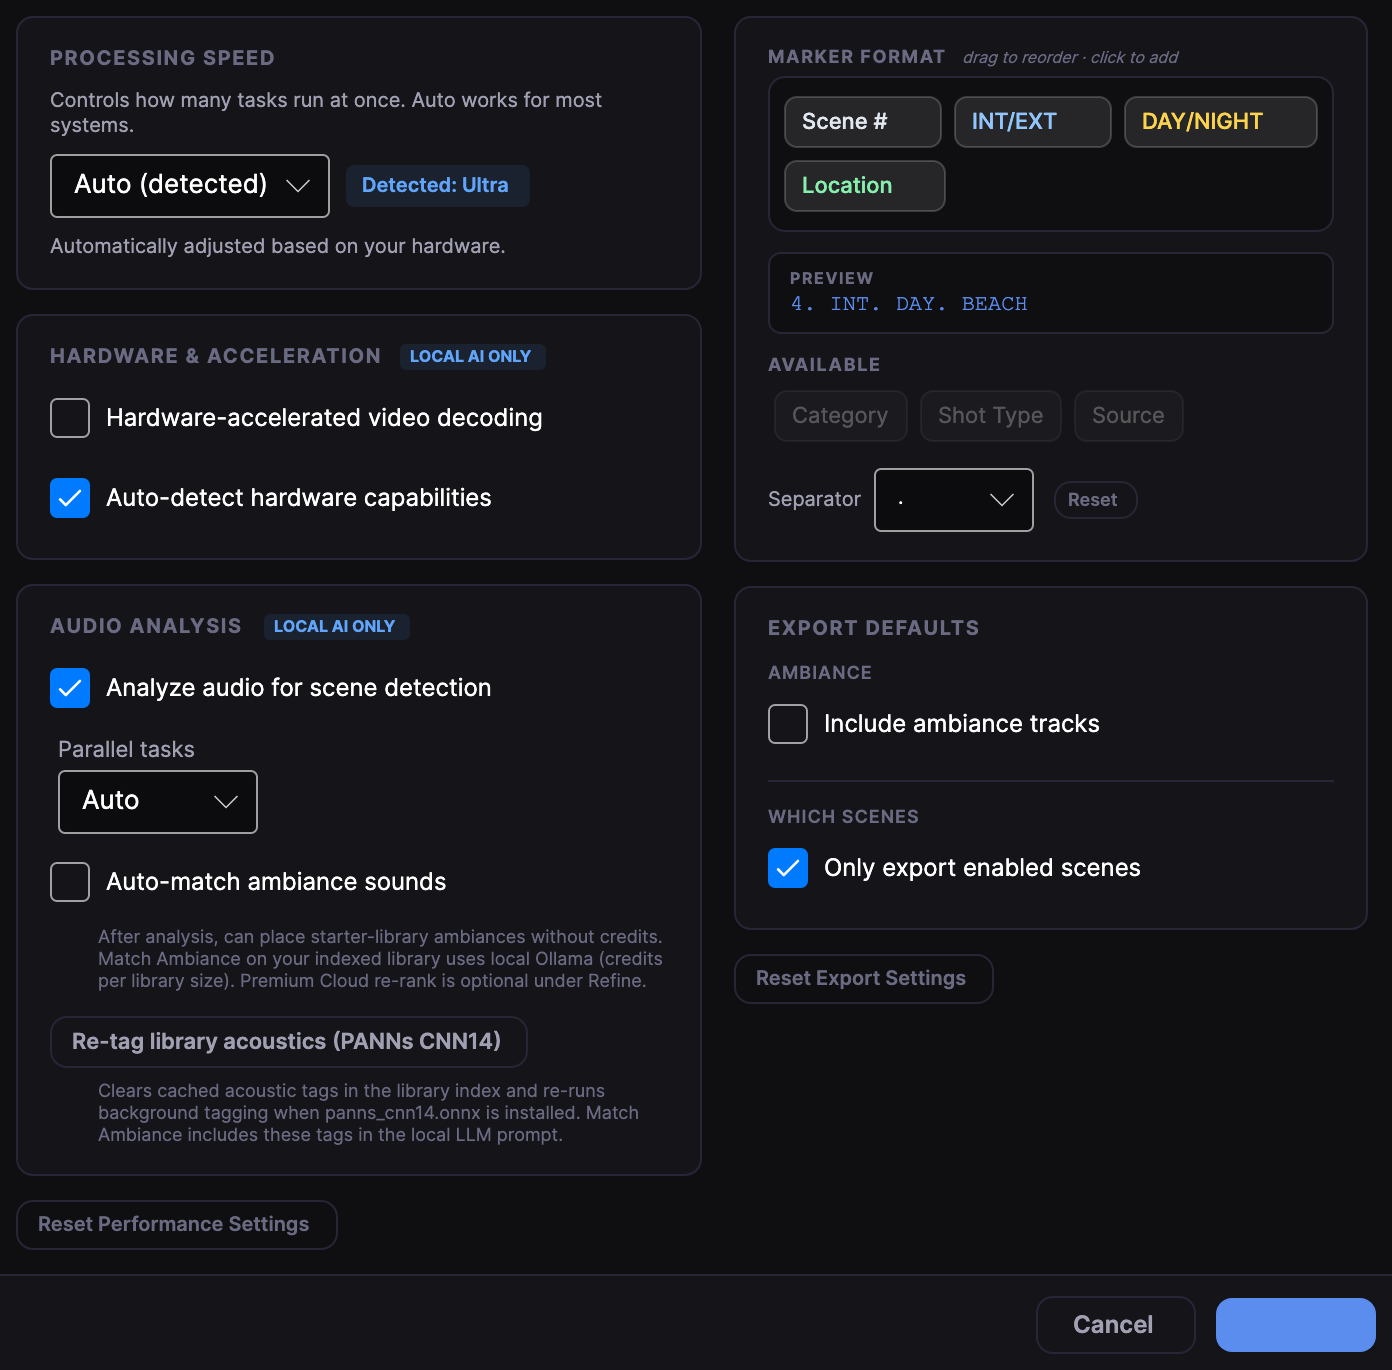
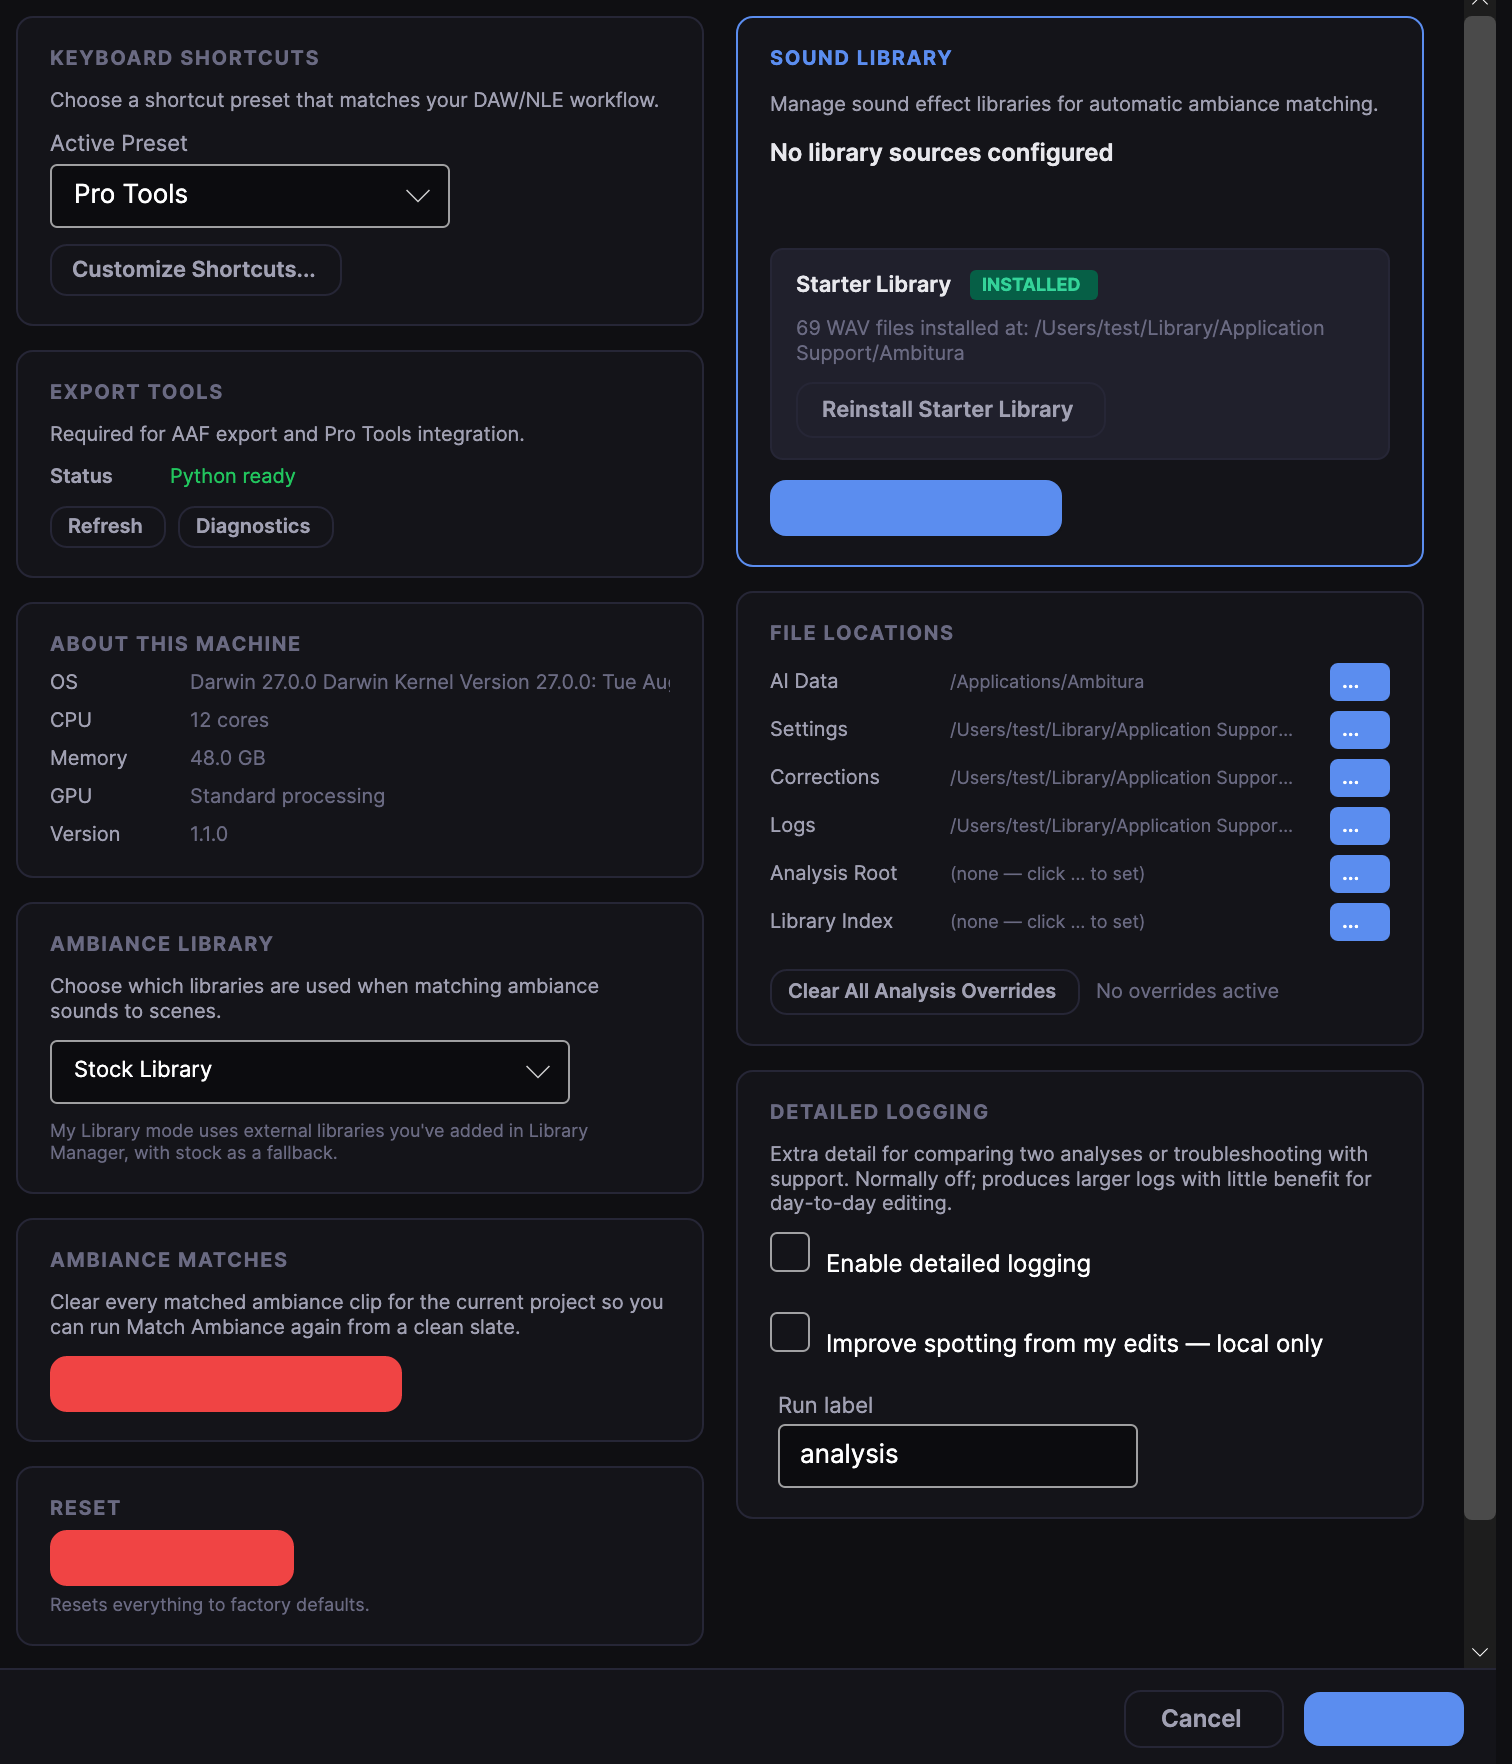
Preferences
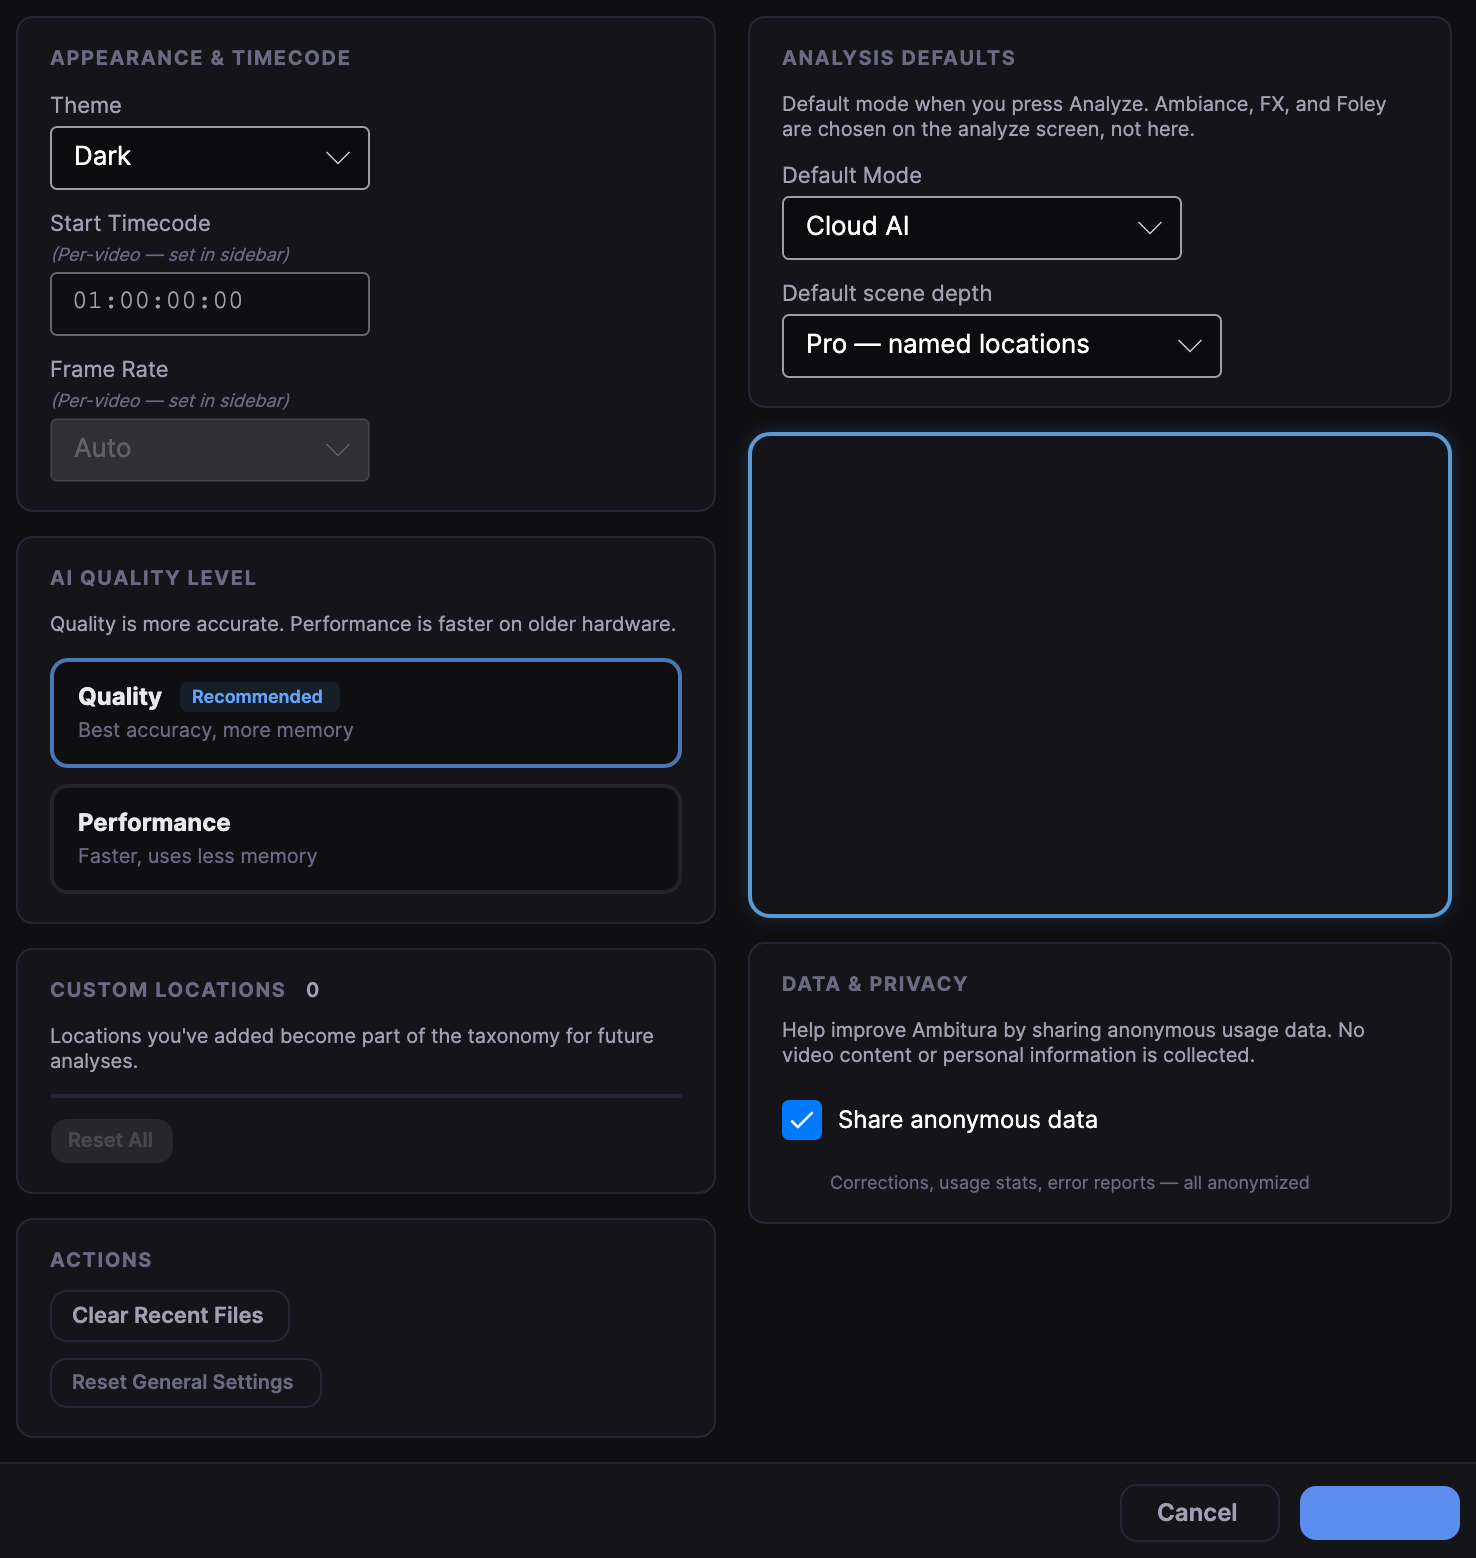
Edit → Preferences. Changes save as you make them. The shortcut is in the keyboard list.
| Section | What lives there |
|---|---|
| General | Theme, language, autosave, default frame rate and start timecode |
| Detection | Profiles, Review Mode as the default. Cut sensitivity stays automatic |
| Performance | Quality or speed, hardware acceleration, reset learning |
| Library and export | Library folders, default export, marker prefix, the workstation you push to most |
| Cloud | The pass selected by default |
| Privacy | Anonymous analytics, crash reports, update checks |
| Presets | Quick tags, location presets, custom genre tuning |
| Keyboard layout | Which workstation’s shortcuts Ambitura mirrors |
Learning
Corrections stay on this computer. Nothing about the project is sent out for this.
- Same-scene and different-scene choices teach similar cuts.
- A location you correct is preferred the next time a similar picture appears.
- If one location is repeatedly mistaken for another, that habit is dropped.
A few projects of your usual material are enough to feel the change. Preferences → Performance → Reset Learning clears it. Detection profiles can be exported and imported from Preferences if you want the same starting point on another machine. The learned picture itself is not a file you hand to a colleague.
Keyboard layout
On first launch, or later under Preferences → Keyboard Layout, pick the layout whose playback and marker keys you already know. This only changes keys inside Ambitura. Export and push stay the same.
| Layout | Feel |
|---|---|
| Ambitura | The default: playback, scene stepping, marker edits |
| Pro Tools | Review and marker placement in that habit |
| Cubase / Nuendo | Steinberg-style editing inside the app |
| DaVinci Resolve | JKL and timeline navigation in that habit |
| Adobe Premiere Pro | JKL and marker navigation in that habit |
Help → Keyboard Shortcuts, or Ctrl+/ on Windows and Command+/ on macOS, shows the keys for the layout that is on. Switching does not need a restart.
When something looks wrong
| What you see | What to do |
|---|---|
| Health report says it is running on the processor | Acceleration is not available. Update the graphics driver. The job still runs, often two to four times longer |
| Video playback unavailable | Reinstall the latest Ambitura. Playback is part of the installer |
| Video tools not found | Reinstall. The missing piece is bundled |
| Pro Tools connection failed | Pro Tools 2022.12 or newer, a session open, live integration on, then push again |
| Old labels come back | A result is cached beside the file. Run Analyse again to replace it |
| Export tools missing | Reinstall. Spotting still works. AAF and the live Pro Tools push need the bundled tools |
| The workstation slows down | The app already eases off when a workstation is open. Preferences → Performance → Speed eases further |
| A cloud run failed and credits were taken | Failed segments are usually returned. If they are not, contact support with the reference the app shows |
Reinstalling keeps settings, library folders, and what the app has learned. That is the first repair after a partial update or a system change.
If a run stops halfway, progress is saved every few seconds. Open the same video and it offers to continue or to start again.
Common questions
Do I need the internet? Local analysis works offline. Cloud passes need a connection. Sign-in needs the internet once; after that there is a grace period before you must sign in again.
Where is my work stored? Settings, presets, and learning live in the app’s user folder. Each picture’s result is saved next to that file, which is why reopening it is immediate.
Can I use more than one computer? Yes, up to the seats on the plan. Deactivate a machine from the account page when you retire it.
Does the picture leave the machine? Not for a local pass. A cloud pass sends only what that pass needs, and the confirmation step says what that is.
Do unused credits carry over? Plan credits reset each billing cycle. Top-up credits add to the plan and expire three months after purchase.
Can I give my learning to someone else? The learned picture stays on your machine. You can export a detection profile from Preferences and import it on another computer.